Using Zotero
Creating a Zotero Library
Zotero’s library system functions similar to a file system on your computer. You can create folders to organize your references, and add tags to references to help you find them later. The images below show how to create a new folder in Zotero, and what a fresh folder looks like.
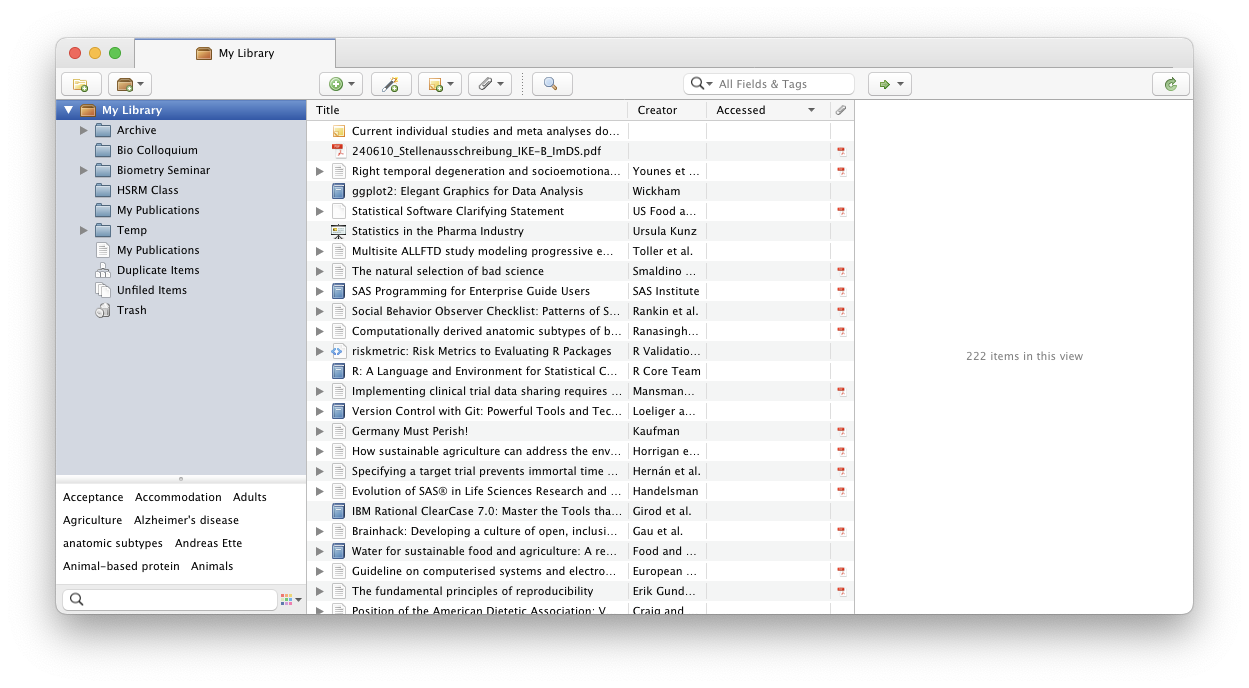
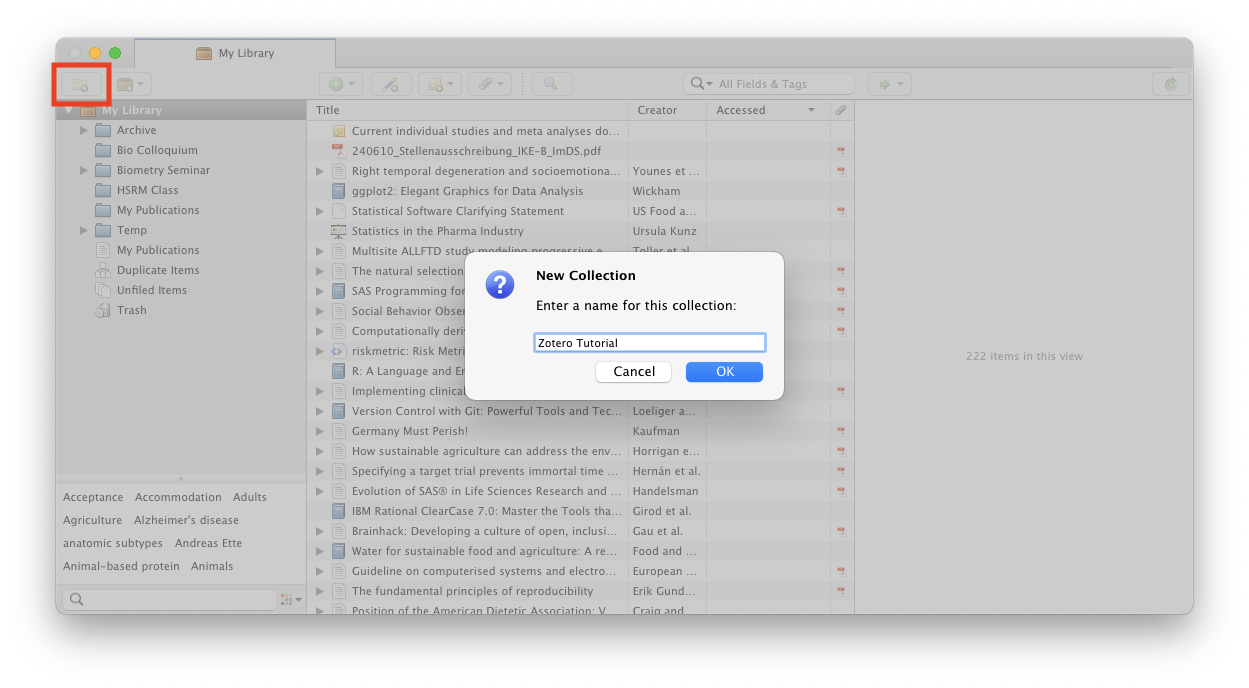
![]()
Adding References
While creating libraries/folders for your projects is highly recommended and useful, the more important step in using Zotero is adding references to your library. You can add references to Zotero in several ways:
- Save to Zotero with the Zotero Connector browser extension
- Manual entry
- Import from online databases.
- Import from other software.
We will outline the first two methods here, as they are the most common ways to add references to Zotero.
Zotero Connector
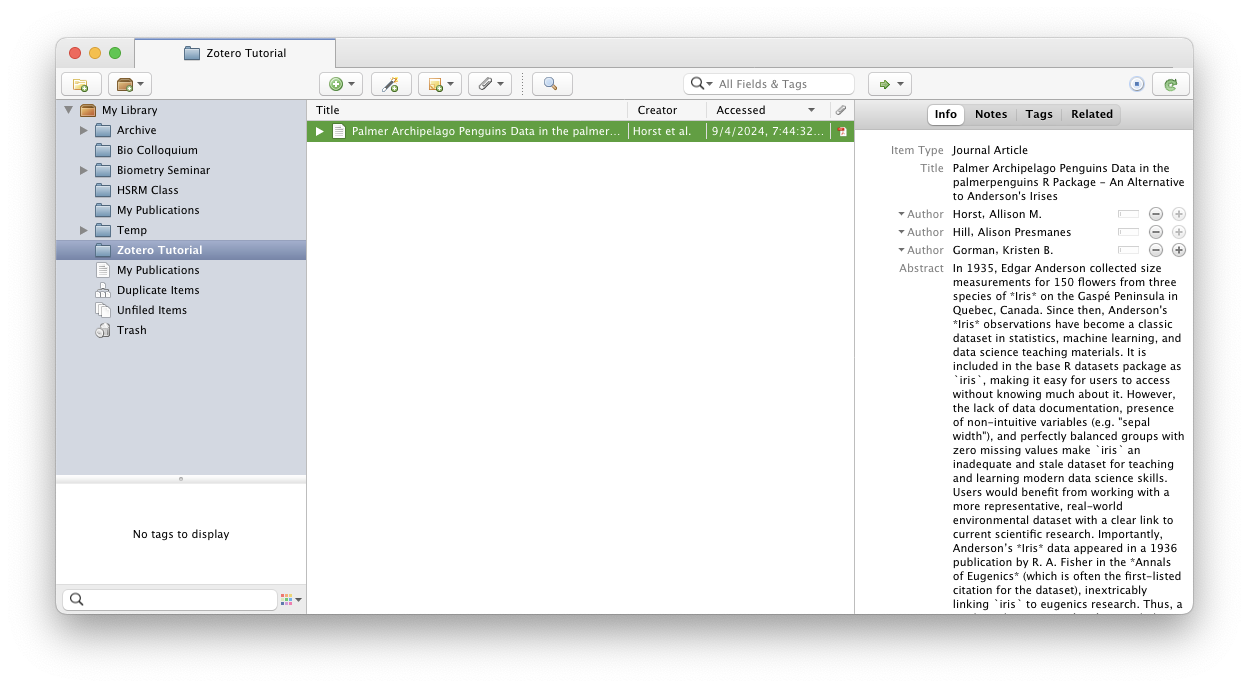
The most common and preferred way of entering references is by using the Zotero Connector browser extension. The Zotero Connector allows you to save references directly from your browser to your Zotero library. The connector will, when possible, download a PDF of the article and attach it to the reference. If you save content from a webpage that does not have an available PDF download of the content, the Connector will take a snapshot of the webpage to preserve the information in case the page is later changed or removed.


Manual Entry
The Zotero Connector is not perfect, however, and you may occassionally need to “manually” enter a reference. To do this, click on the “New Item” button in Zotero, and select the type of reference you want to add. You can then enter the metadata for the reference manually. However, if you can find a BibTex or RIS file for the reference, you can import the reference into Zotero by dragging and dropping the file into the Zotero window, or by copying the BibTex content and then selecting File -> Import from Clipboard in Zotero.
The example below will demonstrate how to manually import a BibTex entry.
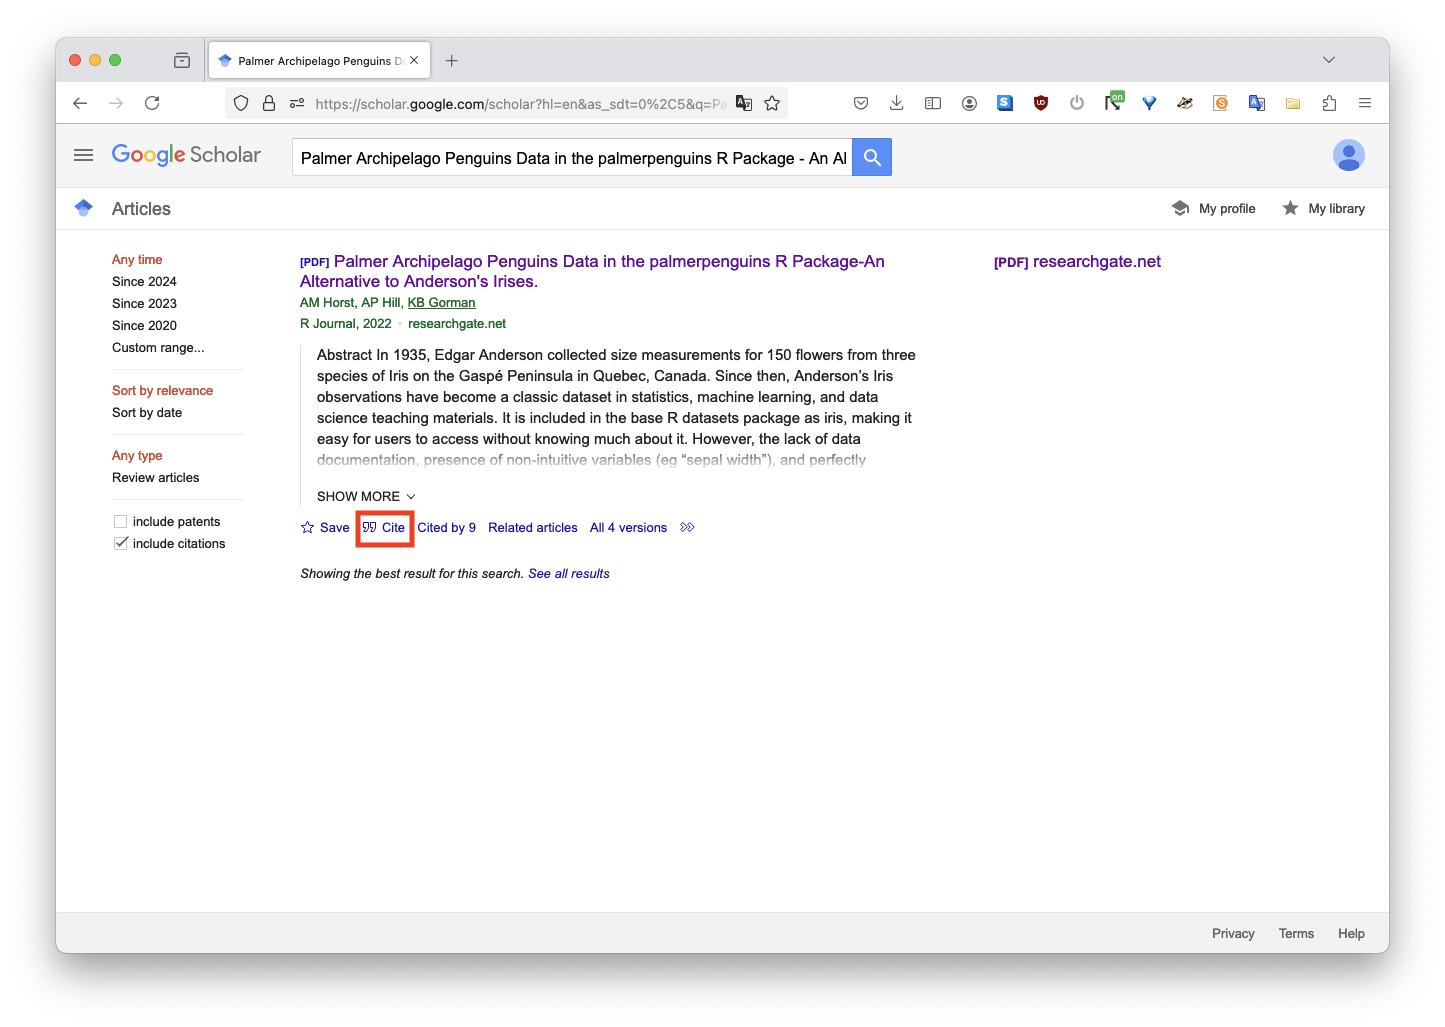
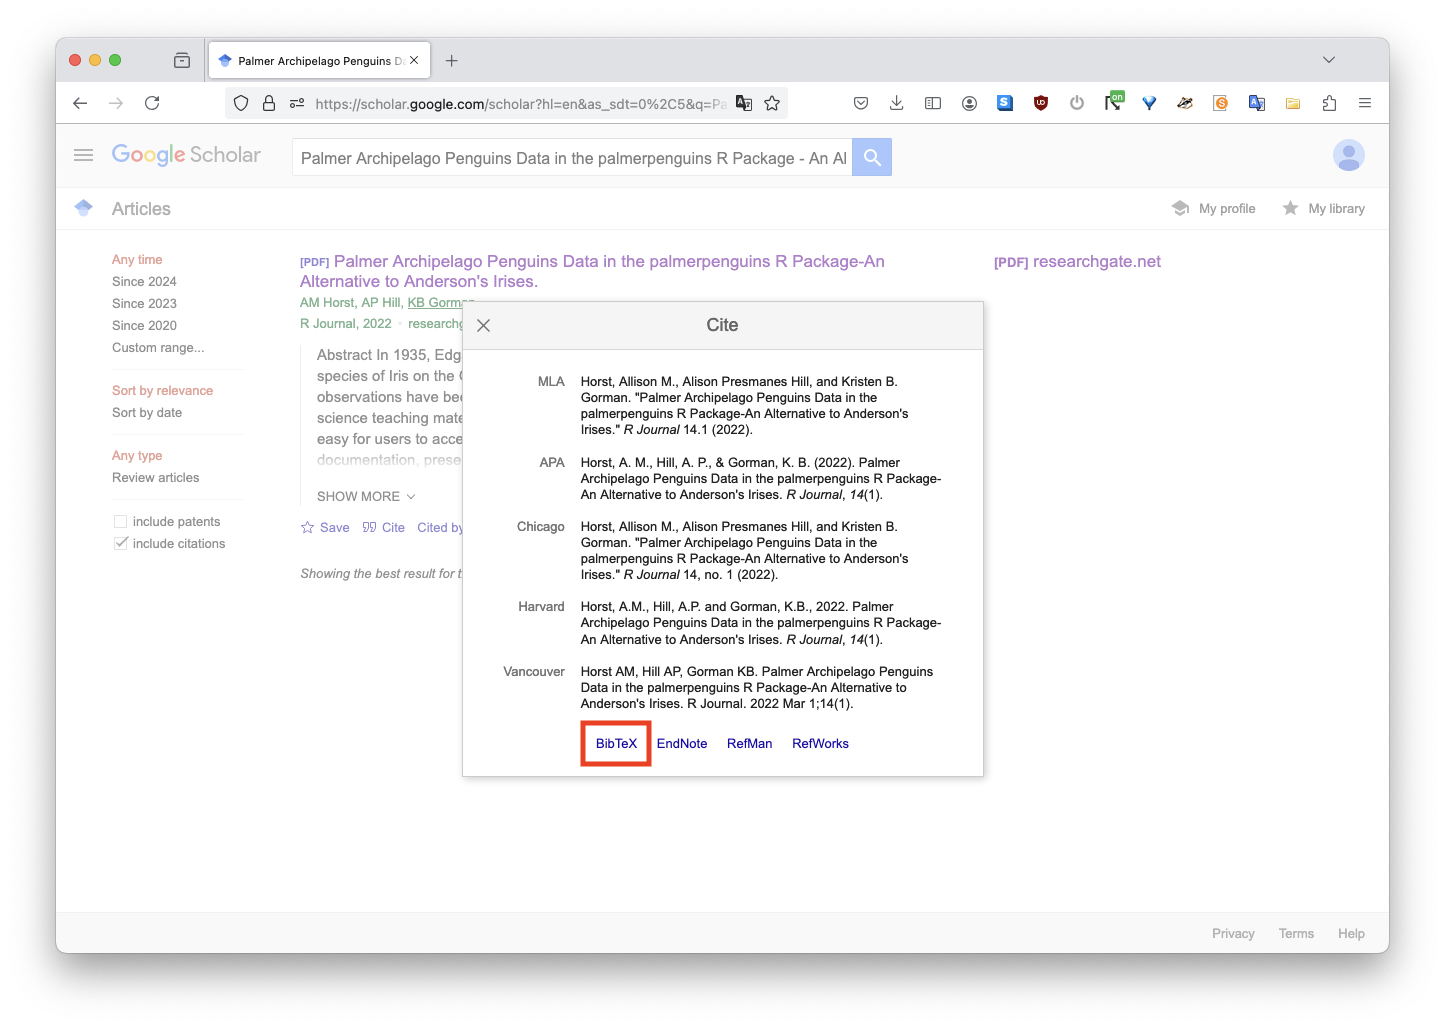
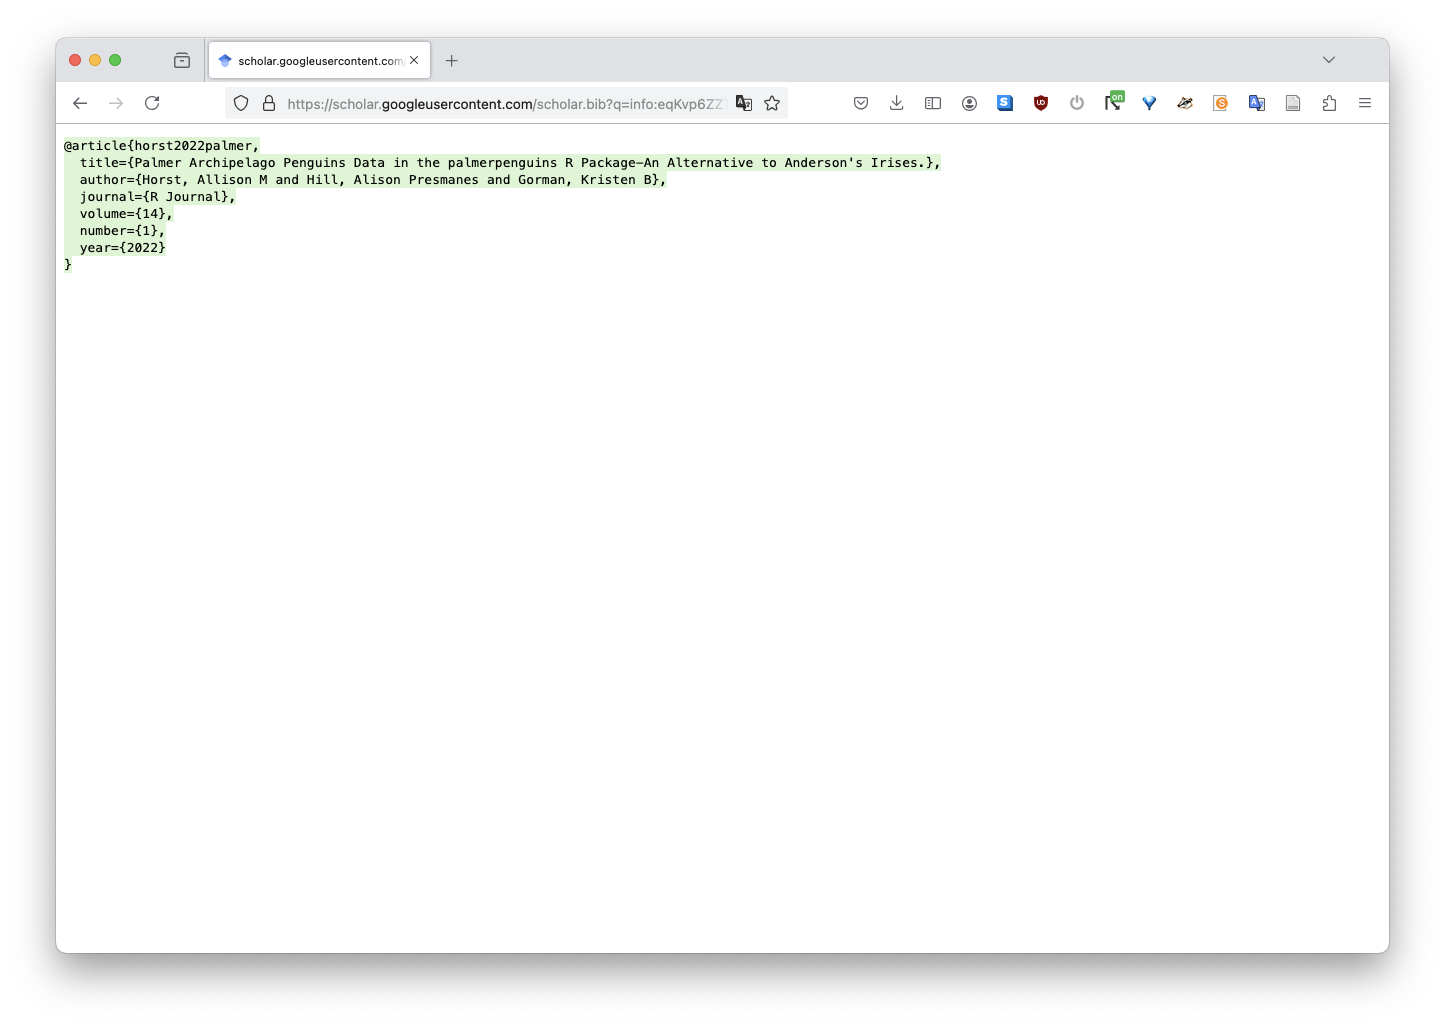
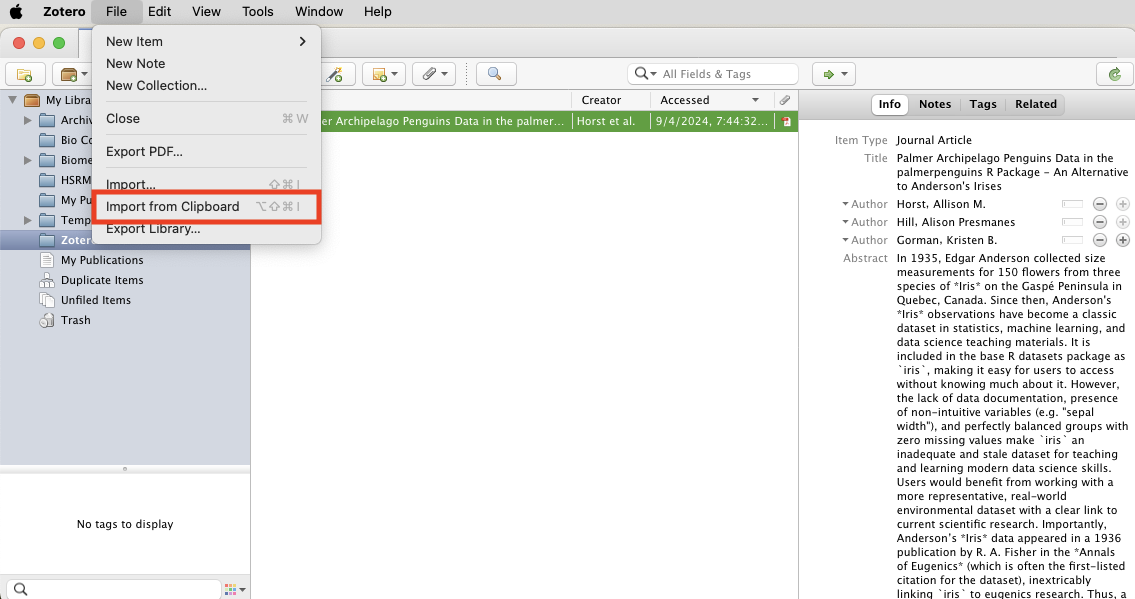
File -> Import from Clipboard to import the BibTex entry.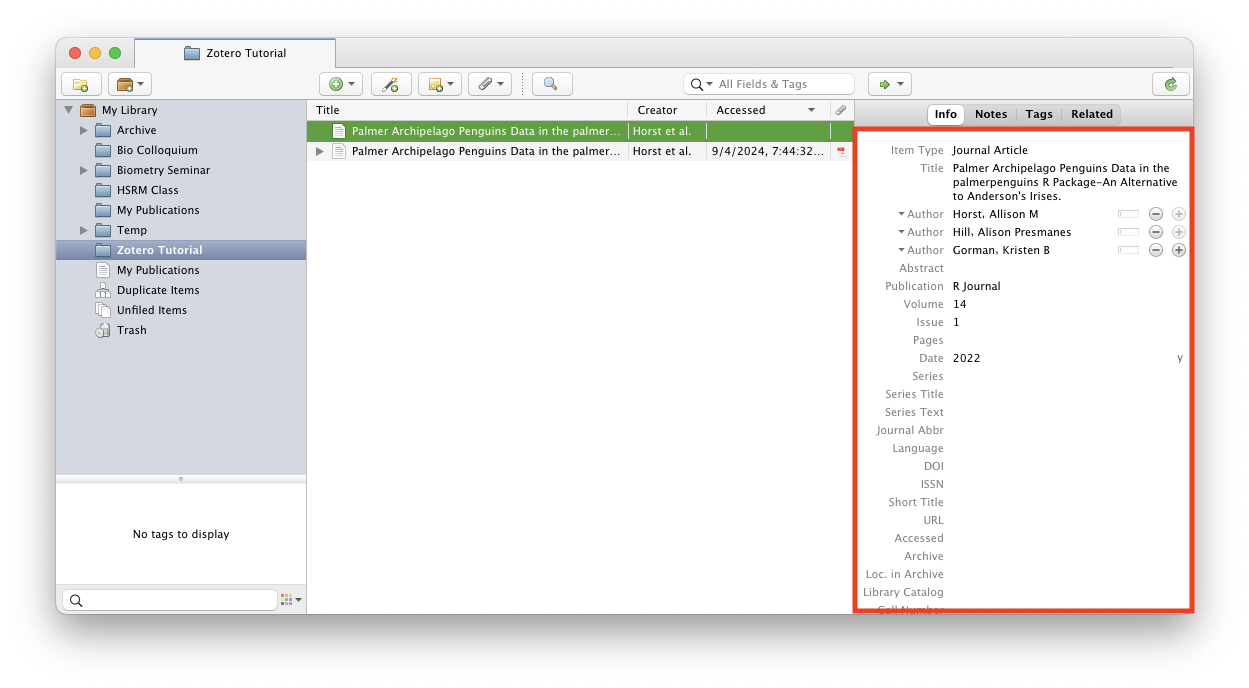
Less commonly, you may need to import references from other software. To do this, export the references from the software in a compatible format, and import them into Zotero. Zotero can import references from a variety of formats, including BibTex, RIS, and EndNote XML.
Citing references
The main point of using Zotero, of course, is to cite references in your documents. Zotero makes this easy by providing plugins for popular word processors like Microsoft Word and LibreOffice. These word processor plugins should be installed automatically when you install Zotero.
Later chapters will detail how to use Zotero with RStudio + Quarto and Word, specifically. We briefly detail here how to generate a bibliography directly from Zotero.
Generating Bibliographies
You can generate a bibliography by clicking on the “Export” button in Zotero, and selecting the citation style you want to use. This will generate a bibliography in the selected style that you can copy and paste into your document. You can generate a bibliography for a single reference, a collection (i.e. a folder), or your entire library. This option to quickly generate a bibliography is useful if you are using a text editor that does not have a Zotero plugin, or if you simply need a one-and-done bibliography for a smaller project
For more details, see the Zotero documentation on creating bibliographies.
Other Features
This page has covered the basics of using Zotero, but there are many other features that Zotero offers that you may find useful. Some of these topics will be covered in more detail in optional chapters at the end of this tutorial, but here are a few other features that you may find useful:
Organizing References
You can organize your references in Zotero by creating collections and tags. To create a collection, click on the “New Collection” button, and give the collection a name. To add references to this collection, simply drag and drop the references into the collection. To add tags to a reference, click on the “Tags” tab, and enter the tags you want to add. These tags are particularly convenient if you want to later search your library for references on a specific topic as defined by you.
Collaborating with others
You can also collaborate with others by sharing your references with them, generally by creating a Zotero Group. The contents of these groups are shared with all members online, and you can set the group to be public or private. Public groups are open to anyone, while private groups require an invitation to join. You can also create a group library, which is a shared library that all members can edit. This is useful if you are working on a project with others and want to share references with them.